sprinkler valve won’t turn on manually
Sprinkler Valve Won’t Turn On Manually: A Comprehensive Troubleshooting Guide
Diagnosing a non-responsive sprinkler valve demands a systematic approach, beginning with verifying power and progressing through mechanical inspections for optimal irrigation.
Initial steps involve confirming the solenoid receives voltage, then meticulously examining wire connections for corrosion or breaks, ensuring proper electrical functionality.
Furthermore, assess the manual bleed screw; if water doesn’t flow when opened, a blockage or upstream issue likely exists, hindering operation.
Remember to prioritize safety by disconnecting power before any physical inspection, and consult local codes regarding backflow preventer requirements.
Understanding Sprinkler Valves
Sprinkler valves are the unsung heroes of efficient lawn and garden irrigation, acting as electronically controlled gateways for water distribution throughout your landscape. These valves, typically installed underground within valve boxes, respond to signals from your irrigation controller, opening and closing to regulate water flow to specific zones.
Fundamentally, a sprinkler valve consists of a solenoid, a valve body, and a diaphragm. The solenoid, when energized, pulls open the valve, allowing water to pass through. The valve body houses the internal components, while the diaphragm seals the valve when the solenoid is de-energized, stopping water flow.
Two primary types exist: electric sprinkler valves and manual sprinkler valves. Electric valves, the most common, rely on electrical signals, while manual valves require physical operation. Zone valves control individual sections, while master valves regulate the entire system. Understanding these components and types is crucial when troubleshooting a valve that won’t turn on manually, as it guides your diagnostic process.
Proper valve function ensures water reaches your plants when needed, conserving water and promoting healthy growth.
Types of Sprinkler Valves
Sprinkler valves aren’t one-size-fits-all; they come in various designs suited for different irrigation needs. The two main categories are electric and manual valves, each with distinct operational characteristics. Electric valves, the most prevalent, utilize a solenoid activated by a low-voltage signal from the irrigation controller to open and close.
Within electric valves, you’ll find globe valves and angle valves, differing in their flow path and installation requirements. Globe valves offer a more direct flow, while angle valves change the water’s direction. Zone valves control individual irrigation zones, while master valves regulate the entire system’s water supply;
Manual valves, less common in modern systems, require physical manipulation to operate. These are often used for testing or as a backup. Understanding these distinctions is vital when diagnosing why a valve won’t respond to manual operation, helping pinpoint whether the issue lies within the electric components or a mechanical blockage.
Choosing the right valve type is crucial for efficient irrigation.
Manual Bleed Screw Functionality
The manual bleed screw, a small component on most sprinkler valves, serves as a crucial diagnostic tool. Its primary function is to release water pressure from the valve’s upper chamber, allowing you to manually open the valve and verify if water reaches the zone. If the screw doesn’t allow water flow when opened, it indicates a problem upstream of the valve – potentially a blocked water supply line or a malfunctioning master valve.
However, a continuously leaking bleed screw suggests the valve isn’t sealing properly, preventing the solenoid from fully closing the water flow. This can be due to debris lodged within the valve or a damaged internal component.
Proper bleed screw operation confirms the valve can physically open, isolating the issue to the electrical or solenoid side if it still fails to operate automatically. Always ensure the bleed screw is fully closed after testing to maintain system pressure and prevent leaks.
Safety Precautions Before Troubleshooting

Prioritizing safety is paramount when troubleshooting sprinkler systems. Always disconnect the power supply to the irrigation controller before commencing any physical inspection or repair work. This prevents accidental activation of valves and potential electrical shock. Locate the main water supply valve and understand how to shut it off quickly in case of leaks or emergencies.
Be mindful of potential hazards around valve boxes, including uneven ground, sharp objects, and insects. Wear appropriate footwear and gloves for protection. When using tools, follow manufacturer’s instructions and exercise caution.
Furthermore, be aware of buried utility lines before digging; Contact your local utility companies to mark their locations. If you are uncomfortable performing any troubleshooting steps, consult a qualified irrigation professional.
Electrical Issues & Testing
Investigating electrical faults requires a voltmeter to confirm solenoid voltage, checking wire connections for continuity, and identifying shorts impacting the plunger.
Proper testing ensures the solenoid receives adequate power, while inspecting wiring reveals breaks or corrosion hindering signal transmission.
Addressing these issues restores electrical functionality, enabling valve activation and proper irrigation system performance.
Checking Solenoid Voltage
Before delving into complex troubleshooting, verifying the solenoid receives the correct voltage is paramount. Turn off the entire sprinkler system at the controller to prevent accidental activation during testing. Locate the solenoid wires – typically color-coded – connected to the valve. Using a multimeter set to AC voltage, carefully probe the solenoid terminals while the zone is actively scheduled to run.
A healthy solenoid should display approximately 24-30 volts AC, depending on your system’s configuration. If no voltage is present, the issue lies upstream, potentially with the controller, wiring, or a faulty zone circuit. Conversely, if voltage is present but the valve remains inactive, the solenoid itself is likely defective and requires replacement. Remember to document your readings for future reference and to ensure accurate diagnosis. Always prioritize safety when working with electrical components.
Using a Voltmeter to Test the Valve
Employing a voltmeter offers a precise method to diagnose sprinkler valve malfunctions. First, ensure the system is powered off for safety. Disconnect one of the solenoid wires – this is crucial for an accurate reading. Set your multimeter to the ohms setting (resistance). Place the probes across the solenoid terminals; a functioning solenoid typically exhibits a resistance reading between 20-40 ohms.
An open circuit (infinite resistance) indicates a broken solenoid coil, necessitating replacement. A reading of zero ohms suggests a short circuit. Alternatively, test for continuity while the zone is scheduled to run – a good solenoid will show continuity only when energized. Carefully reconnect the wire after testing. Document all readings; this data aids in pinpointing the exact cause of the valve’s failure and guides repair decisions.
Inspecting Wire Connections
Thoroughly examine all wire connections associated with the sprinkler valve, as corrosion or loose connections are frequent culprits. Begin by visually inspecting each wire connector for signs of rust, oxidation, or physical damage. Gently tug on each wire to confirm a secure connection; any movement indicates a need for tightening or replacement. Utilize a wire brush or electrical contact cleaner to remove corrosion from terminals, ensuring optimal conductivity.
Pay close attention to connections within the valve’s control box and at the solenoid itself. Check for any exposed wire strands that could cause short circuits. Ensure waterproof connectors are properly sealed to prevent moisture intrusion. If wires are damaged, carefully strip and reconnect them, or replace the entire wire segment. Document any repairs made for future reference.
Identifying Electrical Faults Affecting the Plunger
A malfunctioning plunger, crucial for valve operation, is often linked to electrical issues. Insufficient voltage reaching the solenoid prevents it from generating the magnetic field needed to lift the plunger. Use a voltmeter to confirm the solenoid receives the correct voltage when the zone is activated; a reading significantly below the specified voltage indicates a wiring problem or a failing controller.
Consider a short circuit or open wire disrupting the electrical pathway. Inspect the solenoid coil for burns or damage, suggesting internal failure. A faulty solenoid can’t reliably actuate the plunger. Test the solenoid’s resistance with an ohmmeter; an incorrect reading confirms a faulty coil. Remember to disconnect power before any electrical testing to prevent shock.
Mechanical Problems & Inspection
Thoroughly inspect the valve body for obstructions, ensuring free plunger movement and proper porting; debris accumulation frequently restricts water flow and functionality.
Verify correct arrow direction on components, and confirm the manual bleed switch isn’t interfering with complete valve sealing during normal operation.
Checking Porting and Pathways
Porting within a sprinkler valve is crucial for relieving pressure from the upper valve chamber, allowing the solenoid to effectively open and close the water flow. When a valve won’t turn on manually, inspecting these pathways is essential. Begin by visually examining the valve body for any visible obstructions, such as dirt, sediment, or mineral buildup, that could be blocking the ports.
Carefully disassemble the valve, if possible, following manufacturer instructions, to gain better access to the internal components. Use a small brush or compressed air to clear any debris from the porting channels. Pay close attention to the areas where the plunger seats and the water enters and exits the valve. Ensure that all pathways are clear and unobstructed, allowing for smooth water movement.
A restricted porting system prevents the solenoid from fully opening, even when manually activated. This can manifest as a weak or nonexistent water flow. Remember to reassemble the valve correctly, ensuring all seals are properly seated to prevent leaks. A clear and unobstructed porting system is fundamental to proper valve operation.
Inspecting the Valve for Debris
Debris accumulation is a frequent culprit when a sprinkler valve fails to operate, even with manual activation. Begin by disconnecting power to the valve and carefully removing it from the valve box. Visually inspect the valve body, both internally and externally, for any signs of dirt, sand, leaves, or other foreign objects.
Disassemble the valve, following the manufacturer’s guidelines, to access the internal components. Pay particular attention to the solenoid, plunger, and diaphragm, as these areas are prone to debris buildup. Flush the valve body with clean water to dislodge any loose particles. Use a soft brush to gently scrub away any stubborn debris, avoiding abrasive materials that could damage the valve.
Ensure all debris is removed before reassembling the valve. A clogged valve restricts water flow and prevents the solenoid from functioning correctly. Regular inspection and cleaning can significantly extend the lifespan of your sprinkler system and prevent future malfunctions.
Verifying Arrow Direction on Valve Components
Correct component orientation is crucial for proper sprinkler valve function. Many valves feature directional arrows molded into the body or on internal parts, indicating the intended flow path of water. Incorrect installation, where these arrows aren’t aligned with the water supply, can prevent the valve from opening or sealing effectively, even with manual attempts.
Carefully examine the valve body and all internal components – particularly the solenoid and plunger – for these directional markings. Ensure the arrows point in the direction of the water flow, typically towards the valve outlet or barrel. Misalignment creates resistance and hinders the valve’s ability to regulate water pressure.
If components are reversed, gently disassemble and reposition them according to the indicated flow direction. This simple step can resolve issues where the valve appears stuck or fails to respond to electrical signals or manual override attempts, restoring proper irrigation control.
Manual Bleed Switch Position Check
The manual bleed switch, typically located on the solenoid, is a vital diagnostic tool. Its primary function is to bypass the electrical system and allow water to flow directly through the valve, confirming whether the issue lies within the valve itself or upstream in the irrigation system. However, an improperly positioned bleed switch can prevent the valve from operating normally.
Ensure the bleed switch isn’t left partially or fully open. Even a slightly raised switch can keep the valve from fully sealing, causing constant water leakage or preventing the solenoid from effectively controlling water flow. Fully depress the bleed switch to its closed position before attempting to activate the valve electrically or manually.
If the valve still won’t operate with the bleed switch closed, it indicates a problem beyond the switch itself, requiring further investigation of the solenoid, plunger, or valve body. Remember to test this before disassembling the valve.
System-Wide Checks
Expanding beyond the valve, verify the master valve is open, the backflow preventer isn’t blocked, and timer settings are correct for complete system function.
Adequate water supply pressure is also crucial; low pressure can prevent valve operation, necessitating a thorough system-wide assessment.
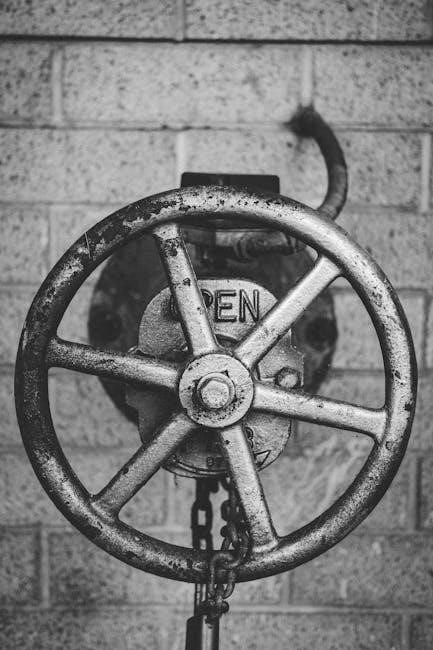
Checking the Master Valve
The master valve, often located near the backflow preventer, acts as the primary on/off switch for the entire irrigation system. If a zone valve won’t turn on manually, the master valve is a critical component to inspect. Some systems require manual opening of the master valve before individual zones can operate, especially after a power outage or winterization.
Locate the master valve – it’s typically housed in a valve box. Observe if the valve is in the open position. If it has a manual override, attempt to open it fully; If the master valve isn’t opening, it could be due to a faulty solenoid, debris obstructing the valve, or a lack of power to the solenoid.
Testing the solenoid with a voltmeter can confirm if it’s receiving the necessary voltage. A non-responsive solenoid indicates a potential electrical issue or a failed component. Remember to always disconnect power before performing any electrical tests. A properly functioning master valve is essential for distributing water to all zones within the irrigation system.
Backflow Preventer Inspection
A backflow preventer safeguards your potable water supply by preventing irrigation water from flowing back into it. A malfunctioning backflow preventer can significantly impact sprinkler system performance, including preventing zone valves from opening. Inspect the device for any visible signs of damage, leaks, or obstructions.
Ensure the backflow preventer’s test valves are functioning correctly; these valves allow you to verify the device is operating as intended. Local building codes often mandate regular backflow preventer testing by a certified professional. A partially or fully blocked backflow preventer restricts water flow, creating insufficient pressure to activate zone valves.
Check for debris accumulation within the backflow preventer’s housing. If you suspect a blockage, consult a qualified irrigation specialist for cleaning and maintenance. Ignoring backflow preventer issues can lead to contamination and potential health hazards, alongside sprinkler system failures.
Reviewing Timer Program Settings
Incorrect timer settings are a surprisingly common cause of sprinkler valve malfunctions. Thoroughly review your irrigation controller’s program to ensure the zone in question is scheduled to operate. Verify the start time, duration, and watering days are correctly configured for the affected zone. A simple oversight, like a disabled program or an incorrect start date, can prevent a valve from receiving a signal.
Check for any conflicting programs that might be overriding the intended schedule. Some controllers allow multiple programs to run simultaneously or sequentially. Ensure the program for the non-functioning zone isn’t being interrupted or canceled by another setting.
Confirm the timer’s clock is accurately set. An incorrect time will cause the program to run at the wrong time, or not at all. Finally, examine the rain sensor or moisture sensor settings, as these can automatically suspend irrigation schedules.
Water Supply Pressure Verification
Insufficient water pressure is a frequent culprit when a sprinkler valve refuses to operate. Low pressure can prevent the valve from fully opening, hindering water flow to the zone. Begin by checking the main water supply pressure to your property; it should ideally be between 40 and 60 PSI.
If the main pressure is adequate, investigate for pressure drops closer to the valve itself. Obstructions in the water line, such as partially closed valves or mineral buildup, can restrict flow. A pressure gauge connected directly to the valve can pinpoint localized pressure issues.
Consider the number of zones operating simultaneously. Running too many zones concurrently can strain the water supply, reducing pressure to individual valves. Ensure your system’s demand doesn’t exceed the available water pressure.

Troubleshooting Chart & Common Causes
Identifying the root cause involves checking timer settings, wiring, solenoid functionality, and water pressure; debris or a faulty valve are potential issues.
Incorrect schedules, broken wires, or a defective solenoid often prevent valve activation, requiring systematic inspection and possible replacement.
Remember to always prioritize safety and consult a professional if the problem persists, ensuring efficient irrigation system operation.
Zone Valve Not Turning On: Common Reasons
Several factors contribute to a sprinkler zone valve failing to activate, demanding a methodical troubleshooting process. A primary culprit is often an improperly programmed timer, exhibiting incorrect watering days, start times, or run durations; a thorough review and adjustment of the timer settings is crucial. Electrical issues are also prevalent, encompassing broken or disconnected wires, corroded wire connections, or a failed solenoid – the valve’s electromagnetic actuator.
Mechanical problems can also impede operation, including debris lodged within the valve body, obstructing the internal components, or a malfunctioning manual bleed screw. Insufficient water supply pressure, stemming from issues with the water source or a partially closed valve upstream, can prevent proper valve opening. Furthermore, a faulty backflow preventer can restrict water flow to the entire system, impacting individual zone valves. Finally, a damaged valve diaphragm or internal components may necessitate valve replacement.
Incorrect Watering Schedules
A frequently overlooked cause of sprinkler valve malfunctions is an improperly configured watering schedule on the irrigation controller. This encompasses several potential errors, including selecting the wrong start dates, setting incorrect times for zone activation, or establishing run durations that are either too short or excessively long. Seasonal adjustments are also vital; schedules optimized for summer may be unsuitable during cooler months, leading to valve inactivity.
Furthermore, ensure the controller’s clock is accurately set, as time discrepancies can throw off the entire watering sequence. Verify that the correct days of the week are selected for each zone, avoiding conflicts or unintended omissions. Consider utilizing rain sensor overrides or smart controller features to automatically adjust schedules based on weather conditions, preventing unnecessary watering. A meticulous review of the programmed schedule is often the simplest solution to a non-responsive valve.
Valve Troubleshooting Chart Overview
A comprehensive valve troubleshooting chart serves as an invaluable tool for systematically diagnosing sprinkler system issues. It typically begins by confirming power to the solenoid, followed by a visual inspection of wiring for breaks or corrosion. Next, the chart guides users to test the solenoid’s voltage using a voltmeter, verifying proper electrical signal transmission.
Mechanical checks include opening the manual bleed screw to assess water flow and inspecting the valve body for debris or obstructions. The chart also emphasizes verifying the correct arrow direction on internal components and confirming the master valve’s status. Common problems, like incorrect watering schedules or low water pressure, are addressed with specific solutions. Utilizing a chart streamlines the process, preventing wasted time and ensuring a thorough investigation.

Repair & Replacement
Addressing a malfunctioning valve often starts with solenoid replacement, but thorough cleaning of valve components can sometimes restore functionality, avoiding full replacement.
However, extensive wear or body damage necessitates a complete valve replacement, ensuring continued efficient irrigation.
Locating compatible parts is crucial; online retailers and local irrigation suppliers offer a wide selection for various systems.
Replacing a Faulty Solenoid
When a solenoid fails, replacing it is often a straightforward process, restoring functionality to your sprinkler system. Begin by completely disconnecting power to the irrigation controller to ensure safety. Carefully remove the solenoid from the valve body, typically held in place by screws or a retaining clip.
Before installing the new solenoid, inspect the valve body and surrounding components for any signs of damage or debris. Clean any corrosion from the electrical connections to guarantee a solid contact. Align the new solenoid correctly, ensuring proper orientation, and securely fasten it to the valve body.
Double-check all wiring connections, verifying they are tight and dry. Reconnect power to the controller and manually test the valve to confirm the replacement solenoid is operating correctly. If the valve still fails to activate, further troubleshooting may be required, potentially indicating an issue beyond the solenoid itself, such as a faulty valve body or wiring problem.
Valve Disassembly and Cleaning
If a solenoid replacement doesn’t resolve the issue, carefully disassemble the sprinkler valve for a thorough cleaning. Begin by disconnecting power and relieving any water pressure. Remove the valve bonnet, exposing the internal components like the diaphragm and plunger. Inspect these parts for accumulated debris, mineral deposits, or damage.
Gently clean each component with a soft brush and water, avoiding harsh chemicals that could degrade the rubber or plastic. Pay close attention to the ports and pathways, ensuring they are free from obstructions; Examine the diaphragm for tears or cracks, replacing it if necessary.
Reassemble the valve, ensuring all parts are correctly positioned and seated. Apply a silicone-based lubricant to the plunger and diaphragm for smooth operation. Reconnect the valve to the system, restore water pressure, and test its functionality. A clean valve often restores proper operation, eliminating manual activation issues.
When to Replace the Entire Valve
Despite diligent troubleshooting and cleaning, certain scenarios necessitate complete sprinkler valve replacement. Extensive corrosion, particularly within the valve body, indicates irreversible damage and compromises structural integrity. Similarly, persistent leaks after multiple repair attempts signal internal failures beyond simple fixes.
If the valve body itself is cracked or broken, replacement is the only viable solution. Repeated solenoid failures within a short timeframe can also point to an underlying valve body issue causing electrical stress. Consider replacement if the valve is old, outdated, or lacks readily available replacement parts;
Ultimately, the cost of continued repairs versus a new valve should be evaluated. A new valve offers reliability and peace of mind, preventing future disruptions to your irrigation system and ensuring efficient water usage.
Finding Replacement Parts
Locating replacement parts for your sprinkler valve is typically straightforward. Begin by identifying the valve’s manufacturer and model number, often stamped directly on the valve body. Local irrigation supply stores are excellent resources, offering expert advice and a wide selection of components.
Alternatively, numerous online retailers specialize in irrigation equipment, providing convenient access to parts with detailed specifications. Major home improvement stores also stock common replacement solenoids, diaphragms, and valve bodies. When ordering online, carefully verify compatibility with your specific valve model.
Consider bringing the old part with you to the store for a direct comparison, ensuring an accurate match. Don’t hesitate to ask store personnel for assistance; they can help identify the correct part and offer installation guidance.

Advanced Troubleshooting
Delving deeper requires examining internal components, diagnosing valve body issues, and understanding plunger mechanics; professional help may be needed for complex repairs.
Understanding Valve Internal Components
Sprinkler valves, despite appearing simple, contain intricate internal parts crucial for operation. The solenoid, an electromagnet, is central; when energized, it lifts the plunger, opening the valve and allowing water flow. A diaphragm seals the valve when the solenoid is off, preventing leaks.
Internal pathways, or porting, direct water flow, and their blockage significantly hinders function. The valve body itself houses these components, and cracks or corrosion can cause issues. The manual bleed screw bypasses the solenoid, offering a direct path for water – useful for testing.
Understanding how these parts interact is key to troubleshooting. A stuck plunger, often due to electrical faults or debris, prevents opening. A damaged diaphragm causes constant leakage. Inspecting these components reveals the root cause of a valve failing to operate, even when manually activated.
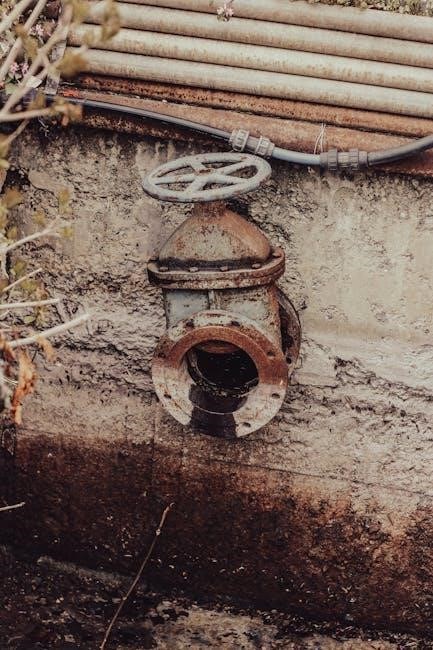
Diagnosing Issues with the Valve Body
The valve body, though seemingly robust, is susceptible to problems impacting functionality. Cracks, often from freezing or ground shifting, cause leaks and pressure loss, hindering operation. Corrosion, particularly in metallic bodies, restricts water flow and damages internal components. Inspect for visible damage, paying close attention to seams and connections.
Mineral buildup inside the body narrows pathways, impeding plunger movement and reducing water pressure. Debris, like dirt or small stones, can lodge within the valve, creating blockages. Carefully disassemble and clean the body, checking for obstructions.
Ensure the valve body’s internal surfaces are smooth and free of irregularities. A compromised body often necessitates replacement, as repairs can be temporary. Thorough inspection reveals if the body itself is the source of the problem, even if other components appear functional.
Seeking Professional Irrigation Help
When troubleshooting proves unsuccessful, or you lack the necessary expertise, engaging a qualified irrigation professional is prudent. Complex electrical faults, hidden leaks, or intricate valve body issues often require specialized tools and knowledge for accurate diagnosis and repair.
Professionals possess the skills to assess the entire irrigation system, identifying interconnected problems beyond a single valve. They can perform comprehensive pressure testing, locate underground leaks, and ensure proper system efficiency. Ignoring underlying issues can lead to recurring problems and increased water waste.
Certified technicians are familiar with local codes and regulations, guaranteeing compliant repairs. Don’t hesitate to seek their assistance if you’re uncomfortable with electrical work or suspect a significant system malfunction. Investing in professional help saves time, money, and potential damage in the long run.